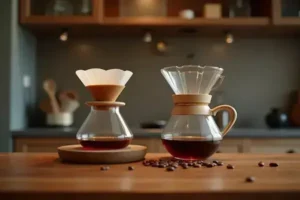
Picture this: you finally bought that iconic Hario V60—sleek glass, swirling ridges, serious coffee cred. Excitement… until your first cup tastes watery or way too sharp. What gives?
If you’ve been chasing that perfect café-style pour over, but end up disappointed, you’re not alone. It’s easy to feel like real coffee mastery is some unreachable secret. The truth? Most of us trip up without even knowing where we went wrong—sometimes it’s the grind, sometimes the pour, usually both.
Stick with me and by the end you’ll have a v60 pour over guide beginners can actually follow. You’ll confidently brew a cup that’s smooth, complex, and way better than your last attempt. Ready for your morning coffee to finally taste just right? Let’s dive in below.
Why The Hario V60 Is A Game Changer For Home Brewing
If you’ve ever wondered why coffee shops fuss over V60s while most drip machines gather dust at home, you’re not alone. There’s a reason the Hario V60 inspires devotion: it lets you control nearly every variable — grind size, pour rate, temperature — in ways most brewers simply can’t.
The truth is, most home coffee setups blunt your flavor potential. Automatic coffee makers trade speed for depth, pushing hot water through grounds with the same force and time every time. That’s convenient… but also why your cup often lands bland or bitter.
How the V60 Changes the Game
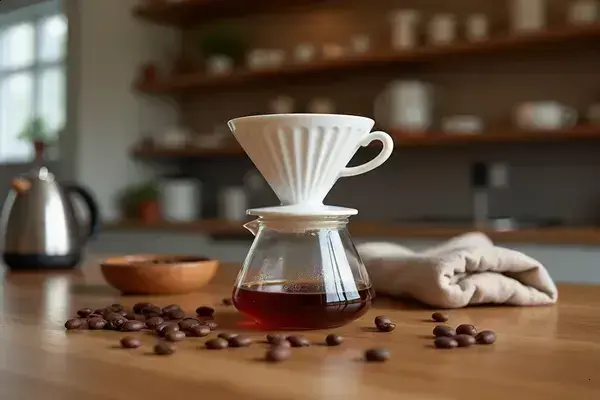
- Precision Spiral Ridges: These spiral grooves along the dripper’s inner wall optimize water flow, making extraction more even. You get clarity — not muddiness — in your cup.
- Single Large Exit Hole: Unlike classic cone brewers, the V60’s open base means your pour speed is king. Want a thicker body? Slow your pour. Prefer a crisp finish? Pour faster. The control is entirely in your hands.
- Paper Filter Design: Hario’s official filters are ultra-thin yet strong, holding back coffee oils that can make brews taste harsh while letting through plenty of nuanced sweetness.
| Feature | V60 | Standard Drip Maker |
|---|---|---|
| Brew Control | Full: pour, timing, temperature | Fixed: auto program |
| Flavor Clarity | High — highlights subtle notes | Low/Medium — notes blend together |
| Learning Curve | Steeper — but rewarding | Very easy — few decisions |
💡 Pro Tip: According to the Specialty Coffee Association, a swirling pour — thanks to the V60’s ridges — increases extraction and brings out brighter acidity, especially with fresh, high-quality beans.
Picture this scenario: You’re brewing a single cup for an afternoon break. With the V60, you adjust the pour to slow down mid-brew, noticing the coffee blooms and an aroma bursts up that an auto-drip never captures. That’s the difference — and the reward.
Worth noting: leading cafes like Blue Bottle and Stumptown use the Hario V60 for tasting new, rare beans because it spotlights every unique characteristic the farm intended. When you master it at home, you’re not just copying the pros — you’re tasting your coffee at its absolute best.
But there’s one detail most home brewers don’t think about until it’s too late: your setup is only as good as your gear. Next up — what you really need (and what’s just hype)…
What You Need: Gear Checklist For Your First Pour Over
Let’s be honest: most new brewers underestimate just how much the right gear impacts a V60 pour over. You might think, “Isn’t it just a dripper and coffee?” But when your first cup doesn’t match your favorite café, the real culprit is usually overlooked equipment.
The Specialty Coffee Association highlights that consistent results only come when you control variables—like grind size, water temperature, and brewing time. For that, you’ll want a few essentials. Don’t worry, you don’t need to buy everything at once. Here’s what really matters:
- Hario V60 Dripper (Plastic, Ceramic, or Glass)
- V60 Size 01 or 02 Paper Filters
- Gooseneck Kettle (Stovetop or Electric)
- Burr Grinder (Manual or Electric)
- Digital Scale (Precision to 0.1g)
- Fresh Coffee Beans (Medium Roast Recommended)
- Timer (Smartphone or Built-in to Scale)
💡 Pro Tip: Pre-wet your paper filter before brewing. This removes any papery taste and primes the dripper to ensure your coffee’s true flavors shine through. According to Hario’s official brewing guides, this small step is game-changing for clean taste.
In practice: Picture this scenario: You’ve got fresh beans from a renowned roaster, but you’re using a blade grinder and a regular kettle. The result? Muddy flavor and imprecise pours—the difference is night and day. When you switch to a burr grinder and gooseneck, suddenly your cup has sweet notes you never tasted before. It’s not just hype; it’s science.
| Gear | Why It Matters | Best Budget Alternative |
|---|---|---|
| Burr Grinder | Consistent particle size = stable extraction | Timemore C2 Manual Grinder |
| Gooseneck Kettle | Precise pouring for even saturation | Hario V60 Buono |
| Digital Scale | Control ratios down to 0.1g | Hario Drip Scale |
But there’s one detail many beginners forget: even top-quality beans fall flat when the grind, pour, or ratio is off. And this is exactly where most people make the most common mistake…
How To Nail The V60 Pour: Step-By-Step Essentials
How do professionals create that bright, balanced cup from the Hario V60, when most attempts at home taste like over-extracted mystery? The answer isn’t magic—it’s mindful process, and you can absolutely do it.
- Prerequisites: You’ll need a V60 dripper, fresh medium-roast beans, burr grinder, paper filter, gooseneck kettle, digital scale, timer, and a carafe or sturdy mug. Allow 4–6 minutes from grind to cup.
- Heat Your Water — Bring filtered water to 200°F (93°C). Too cool? You’ll get flatness. Too hot? Bitterness creeps in.
- Weigh and Grind Your Coffee — Use a 1:16 ratio (e.g., 20g coffee to 320g water). Grind medium-fine, like table salt; consistency is key for extraction.
- Rinse the Filter — Place the filter in the V60 and rinse with hot water. This preheats the dripper and eliminates paper taste.
- Add Coffee and Set Up — Pour ground coffee into the filter, shake gently to level the bed. Set the V60 on your scale, tare it to zero.
- Bloom — Start your timer. Pour 40g of hot water in a spiral to evenly wet all grounds. Wait 30–45 seconds as gases bubble—a critical step for flavor clarity.
- Main Pour — After bloom, pour water in slow, concentric circles. Keep the level steady; don’t rush. You want your total brew time to hit about 2:30–3:00 minutes.
- Let It Drain & Enjoy — Once the dripping slows, remove the V60. Swirl your carafe gently—the aroma lets you know you nailed it.
💡 Pro Tip: The National Coffee Association recommends using filtered water and weighing both coffee and water every time. Guesswork rarely produces repeatable results—the pros know precision counts for everything here.
Picture this scenario: It’s a Saturday morning, sun streaming in, and you’ve dialed your grinder just right. You pour with slow intention. The bloom pops and—suddenly—your kitchen smells like your favorite specialty café. That first sip tastes balanced, a little sweet, and oh-so-satisfying. That’s the reward of process.
But there’s a snag that trips up even careful brewers: tiny mistakes (a rushed pour, uneven grind, or missed bloom) can torpedo your results. What actually works might surprise you…
Troubleshooting: Common V60 Mistakes And Easy Fixes
Why does your V60 sometimes taste sour, bitter, or just plain “meh” — even when you follow every instruction? The culprit is nearly always a handful of repeatable mistakes, most of them simple to fix once you recognize the signs.
- Bland or Weak Brew: Usually caused by too coarse a grind, under-dosing coffee, or pouring too quickly. Try a finer grind and slow down your pour for better extraction.
- Bitter or Over-Extracted: Often due to water that’s too hot, over-fine grind, or too slow a pour. Lower your temp to around 200°F and make the grind slightly coarser.
- Sour or Sharp Flavors: This points to under-extraction — either your water’s too cool, grind is too coarse, or brew time is too short.
💡 Pro Tip: The Specialty Coffee Association recommends calibrating your grinder every few weeks and using filtered water to keep flavor consistent. Small changes prevent recurring issues.
The Troubleshooting Table
| Issue | Likely Cause | Easy Fix |
|---|---|---|
| Bland/Wiry | Coarse grind, fast pour, low dose | Finer grind, slower pour, up dosage |
| Bitter/Harsh | Over-fine grind, hot water, slow pour | Coarser grind, 200°F temp, pour steadily |
| Sour/Acidic | Coarse grind, cool water, short bloom | Finer grind, increase temp, extend bloom |
Picture this scenario: You brew cup after cup, chasing café perfection, but your V60 always comes out a little dull. Only after you move your kettle in slower, tighter spirals—and grind a touch finer—does your next pour suddenly bloom with sweetness. Sometimes, it’s just that one tweak.
And honestly? Even the best baristas with years behind the bar rely on their troubleshooting checklists. Blue Bottle Coffee, for example, trains staff to “taste, adjust, and repeat” with every brew. Don’t get discouraged—tiny tweaks deliver huge improvements over time.
But there’s a part most V60 owners ignore until much later—the way you experiment with grind, temperature, and ratio unlocks your unique flavor profile. What actually works might surprise you…
Finding Your Flavor: Dialing In Grind, Ratio, And Temperature
How can two V60 brewers use the same beans—yet end up with completely different cups? The answer lies in fine-tuning three key variables: grind, ratio, and temperature. Your unique palate gets to call the shots here, not some golden rule.
Dial-In Criteria
| Variable | Typical Range | Impact on Flavor |
|---|---|---|
| Grind Size | Medium-fine (like table salt) | Too coarse = sour; too fine = bitter |
| Coffee:Water Ratio | 1:15–1:17 | More coffee = richer body; less = lighter taste |
| Water Temp | 195–205°F (90–96°C) | Hotter = more extraction; cooler = brighter & lighter |
💡 Pro Tip: According to the Specialty Coffee Association, start at a 1:16 ratio and 200°F. Adjust one variable at a time—the smaller the tweak, the easier it is to taste the difference.
Picture this scenario: You try a new Ethiopian roast with your usual V60 routine and find the cup tastes sharper than expected. You cut back the temperature by a couple of degrees and coarsen the grind just a bit. The next brew? Suddenly lemony and balanced—it’s your “aha” moment.
- Grind: Use a burr grinder for even particles. Adjust finer if your coffee tastes weak and sour, or coarser if it’s too strong or harsh.
- Ratio: Weigh beans and water every time. More coffee to water gives you body; less brings out delicate flavors.
- Temperature: Digital kettles let you dial it in. For dense, dark roasts, try the lower end (195°F). For light and fruity beans, inch higher.
The National Coffee Association notes that most home brewers overlook how changing just one of these factors can swing a cup from flat to fantastic. The best approach is to keep notes of each brew. Over a week or two, you’ll develop a “recipe” that’s truly your own—no guesswork, only satisfaction.
The right habits in place now make everything easier from here.
Your Best V60 Brew Starts Now
If you take just one thing from this guide, let it be: the real power of the v60 pour over guide beginners is in your hands — and your willingness to tweak, taste, and trust the process. Remember to get the right gear, master the pour, and stay curious with every cup you brew.
Before, making coffee at home felt like a guessing game. Now you know exactly how grind, ratio, and temperature shape every sip. You’re not stuck anymore — you’re equipped, confident, and ready to craft café-quality flavor every single morning. That’s a real change.
What flavor profile or technique are you most excited to try out first with your V60? Share your next experiment (or your trickiest questions) down in the comments. We’re here to cheer you on!

Ethan Cole Hargrove is a pour over coffee enthusiast, specialty coffee writer, and the founder of this blog — built for anyone who has ever tasted a truly great cup of coffee and wanted to understand exactly how to make it at home.
Ethan’s coffee journey started the way most do — with a supermarket blend and a cheap drip machine. Then one morning at a specialty café, a barista handed him a pour over and everything changed. The clarity, the complexity, the way the same bean could taste completely different depending on how you brewed it. He was hooked.
What followed was years of testing every dripper, grinder, kettle, and filter he could get his hands on. Comparing Chemex vs V60 vs Kalita. Dialing in grind size by the click. Learning why water temperature matters more than most people think. Building a morning ritual around a process that is as meditative as it is delicious.
Ethan is not a Q Grader, certified barista, or