Picture this: it’s early, you crave a bright, clean cup that wakes you up and soothes you all at once — but your pour over tastes flat and weak. It’s frustrating, right?
Maybe you’ve tried to follow a YouTube tutorial, maybe you’re guessing how hot that water should be or whether your grinder is even doing the job. One little miss, and suddenly your morning ritual feels like a chore — wasted beans, disappointing flavor, more confusion. Here’s the thing: it doesn’t have to be this hard.
By the end of this guide, you’ll have a no-nonsense pour over setup checklist beginners actually need, with every step and tool spelled out. You’ll feel confident setting up your new routine — and that first sip? It’s about to be a whole new world. Ready?
Essential Gear For Pour Over Coffee At Home
When starting out with pour over coffee at home, picking the right gear can feel overwhelming. Glass, ceramic, metal—what actually makes a difference? And do you really need all those gadgets lining the shelves at specialty stores?
The truth is: the essentials boil down to a handful of carefully chosen items. Get these right, and you’ll set yourself up for a consistently smooth, nuanced cup—without the trial-and-error mess (or the wasted beans).
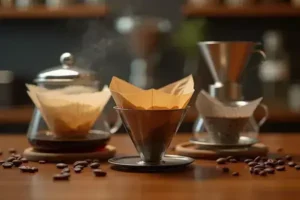
- Pour Over Dripper: The most popular options are the Hario V60 (ceramic or plastic), Chemex (glass), and Kalita Wave (stainless steel). Each dripper changes how the water flows and the resulting flavors. Personal preference matters more than price.
- Carafe or Server: Look for borosilicate glass or durable plastic. While some brew directly into a mug, a dedicated server helps maintain temperature—and looks great on the table.
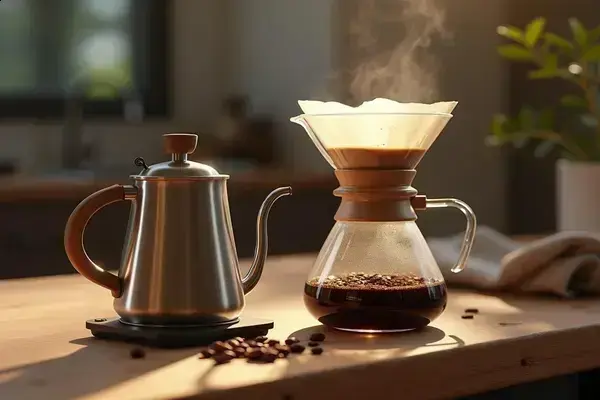
- Gooseneck Kettle: Manual control over water flow is what separates a game-changing pour from a watery disaster. Electric gooseneck kettles (like Fellow Stagg EKG) offer precise temperature for optimal extraction.
- Coffee Scale: Consistency is king. A digital scale sensitive to 0.1g, such as the Hario V60 Drip Scale or Timemore Black Mirror, ensures the right coffee-to-water ratio every time.
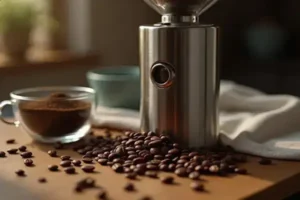
- Manual Coffee Grinder: Fresh grinding is non-negotiable—aim for a burr grinder, which produces even grounds. The Timemore Chestnut C2 or the Baratza Encore (electric) are favorites according to the Specialty Coffee Association.
💡 Pro Tip: Pre-heating your dripper and carafe with hot water not only ensures thermal stability for extraction but also minimizes flavor loss. The National Coffee Association recommends it for every manual brew.
| Gear Item | Best For | Key Benefit |
|---|---|---|
| Hario V60 | Flavor clarity & speed | Widely available, many sizes |
| Chemex | Smoothed-out brews, sharing | Filters out oils, improves mouthfeel |
| Kalita Wave | Forgiving extraction | Flat base simplifies technique |
| Fellow Stagg Kettle | Precision pours | Variable temperature settings |
| Timemore Grinder | Fresh daily grinding | Budget-friendly, consistent burrs |
Picture this scenario: You wake up early, grind fresh beans, and use your new gooseneck kettle for a slow, controlled pour—resulting in a cup that’s bright, balanced, and way better than anything from a pod machine. That’s the feeling the right setup delivers.
But there’s one detail most owners completely overlook until it’s too late…
How To Choose The Right Coffee Beans And Grind Size
How do you stop your pour over from tasting sour or muddy? It almost always starts with the beans and grind size. You can own all the best gear, but if you’re not dialing in these two variables, flavor will stay frustratingly out of reach.
Choosing coffee beans isn’t as mysterious as it seems. Look for details like single-origin (from one farm or region) versus blends, roast date, and whether the roast is light, medium, or dark. Light and medium roasts are recommended by the Specialty Coffee Association for pour over because they highlight bright, nuanced flavors—think citrus, flowers, or cocoa—instead of just deep bitterness.
- Single-Origin: Clear, focused flavor, distinct regional notes.
- Blend: Balanced, approachable, and sometimes more consistent from batch to batch.
- Light Roast: Best for complex, fruity notes.
- Medium Roast: Warm, balanced, and sweet without too much bitterness.
- Dark Roast: Bold, smoky, but often flattens the natural taste—less ideal for pour over newbies.
💡 Pro Tip: Always look for beans harvested within the past year and roasted within the last month. Freshness, not just fancy branding, is the real key to flavor clarity—confirmed by the National Coffee Association.
Grind Size: The Hidden Variable
What about the grind? Here’s where even seasoned home brewers slip up. If your grind is too coarse, water runs through too quickly, leaving your brew under-extracted and sour. Too fine? Water gets trapped, over-extracting bitter compounds.
| Brew Time | Grind Size | Result |
|---|---|---|
| 1-2 minutes | Too coarsely ground | Sour, weak, underdeveloped flavors |
| 3-4 minutes | Medium-fine (ideal) | Sweet, balanced, bright |
| 5+ minutes | Too finely ground | Bitter, harsh, astringent |
In practice: imagine you’ve picked up a bag of fresh, single-origin Ethiopian beans—medium roast, roasted two weeks ago. With a good burr grinder set to medium-fine, your pour over draws down in about 3 minutes. The flavor is vibrant—a little citrus, delicate sweetness, none of the harshness you dreaded. It’s a different world from last week’s stale, pre-ground blend.
And this is exactly where most people make the most common mistake…
Step-By-Step Brew Process: Getting It Right Every Time
Ever had a pour over that tasted completely different from one day to the next—even though you swear you did everything the same? Consistency is where most home brewers struggle. The secret isn’t fancy equipment; it’s following a repeatable process, step by step.
- Required Items:
- Pourover dripper (like Hario V60, Kalita Wave, or Chemex)
- Paper or metal filter
- Freshly ground coffee
- Gooseneck kettle (preferably with temperature control)
- Digital scale
- Timer
- Filtered water (ideally 195–205°F / 90–96°C)
- Server or mug
- Heat Water: Bring filtered water to 200°F (93°C) for optimal extraction. Filling the kettle to avoid multiple boils keeps mineral content stable.
- Weigh Coffee: Most pros recommend a 1:16 coffee-to-water ratio. For a single cup (about 350ml), use 22g of coffee.
- Grind Fresh: Set your burr grinder to medium-fine. Grind right before brewing to preserve delicate aromatics—this is where you truly notice a flavor upgrade.
- Prepare Filter & Gear: Rinse your filter with hot water (reduces paper taste and preheats the dripper). Warm your carafe or mug too.
- Add Grounds: Place coffee into the filter. Give the dripper a gentle shake to level out the bed for even saturation.
- Bloom: Start timer. Pour just enough hot water (about 2x the weight of coffee, so ~45g) to saturate the grounds. Wait 30-45 seconds—watch the “bloom” as coffee releases CO₂.
- Main Pour: With a slow, circular motion, gently add water in stages until you reach your total weight (around 350g for one cup). Avoid pouring around the filter’s edge—this can cause channeling.
- Drawdown: Let the water finish draining completely. Total brew time should hit 2:30 to 3:30 minutes for most recipes.
- Remove Filter & Serve: Discard filter, swirl the carafe to blend, and pour into your favorite mug.
💡 Pro Tip: If your brew finishes much faster or slower than 3 minutes, adjust your grind finer (for under 2:30) or coarser (for over 4:00) next time. Baristas at the Specialty Coffee Association swear by this for dialing in flavor.
In practice: you time your bloom, keep pours even, and find your flavors finally “pop”—there’s sweetness, balance, maybe a hint of fruit or chocolate. That’s when you realize you’re not just making coffee, you’re brewing with intention.
What actually works might surprise you…
Troubleshooting Common Pour Over Mistakes
Ever wondered why your pour over sometimes tastes bitter, sour, or just dreadfully flat—even though you followed the steps to the letter? Nearly every home barista runs into these hiccups, but the fixes are easier than you think.
- Bitter or Over-Extracted Brew: Your grind might be too fine or you may be brewing too long. Check your water temperature, too—anything above 205°F (96°C) can scorch the grounds.
- Sour or Under-Extracted Taste: Happens with a grind that’s too coarse, water that’s not hot enough, or pour times that are too short. Aim for a steady, controlled pour and a total brew time around three minutes.
- Weak, Watery Coffee: Most often, you’re not using enough coffee or your grind is overly coarse. Don’t hesitate to increase the dose or dial your grinder finer.
- Uneven Extraction (Channeling): Pouring water straight to the edges or an uneven coffee bed can cause this. Gently shake the dripper to level the grounds before pouring.
⚠️ Important Warning: Old, stale beans will sabotage your pour over every single time—no method can save flavor lost to age. According to the Specialty Coffee Association, using beans roasted within the last month is critical for optimal brews.
Quick Reference Table
| Problem | Most Likely Cause | How to Fix |
|---|---|---|
| Bitter | Too fine grind / too hot | Grind coarser, lower temp |
| Sour | Too coarse grind / too cool | Grind finer, hotter water |
| Weak | Too little coffee / too fast brew | Add coffee, slow the pour |
| Grassy or Flat | Stale beans | Use fresh-roasted coffee |
In practice: picture this scenario—a friend visits and your carefully prepared pour over ends up mouth-puckeringly bitter. You realize you left the grind setting on “espresso” by mistake. Adjusting it coarser next time fixes the problem instantly.
And this is exactly where most people make the most common mistake…
Simple Checklist: Everything You Need Before You Brew
Is there anything worse than setting aside time for your perfect morning coffee—only to find you’ve forgotten a filter or run out of fresh beans? Having a pour over checklist means you’ll never get blindsided by missing gear or stale ingredients again.
Your Essential Pre-Brew Checklist
- Fresh Coffee Beans: Roasted within the last month, high-quality, ideally single-origin for better flavor notes.
- Grinder: Burr grinder recommended for consistent particle size and even extraction—manual or electric.
- Gooseneck Kettle: Allows precise pouring; temperature control is a plus for flavor optimization.
- Pour Over Dripper: Clean and ready to use; match filters to dripper type (Hario V60, Chemex, Kalita Wave, etc.).
- Filters: Paper or metal, size must fit your dripper style and batch size.
- Digital Scale: For consistent ratios—measure both coffee and water (accuracy to at least 0.1g preferred).
- Timer: Smartphone or analog timer to keep your bloom and pour phases on track.
- Server or Mug: Warmed up, clean, and large enough for your batch size.
- Filtered Water: Soft or purified water makes an outsized impact on taste—follow SCA guidelines for mineral content.
💡 Pro Tip: Keep a copy of this checklist by your coffee station, and check off every item before every brew. According to the Specialty Coffee Association, mise en place—preparing all items in advance—can improve both workflow and cup quality.
In practice: picture this scenario—your alarm rings, you glance at your checklist, and every single item is ready to go. No frantic searching, no ruined moods. Your routine just flows, from the grinder’s first turn to that satisfying last sip.
Once this is in place, the rest of the routine falls into place naturally.
Your Best Brew Starts Here
If you take just one thing from this guide, let it be this: a thoughtful pour over setup checklist for beginners is your secret to consistent, delicious coffee at home. Start with the right equipment, choose fresh beans and the ideal grind, and follow a simple brewing process—mistakes included, learning guaranteed.
Maybe pour over felt intimidating before, with uneven results and lots of guesswork. Now? You know the steps, the why behind each detail, and exactly what to check before that first pour. With every cup, confidence builds. Coffee doesn’t have to be complicated—you’re ready for clarity and joy in your daily routine.
What’s the trickiest part of your pour over setup that you’re determined to master first? Share your thoughts or questions in the comments—let’s make your next cup the best one yet!

Ethan Cole Hargrove is a pour over coffee enthusiast, specialty coffee writer, and the founder of this blog — built for anyone who has ever tasted a truly great cup of coffee and wanted to understand exactly how to make it at home.
Ethan’s coffee journey started the way most do — with a supermarket blend and a cheap drip machine. Then one morning at a specialty café, a barista handed him a pour over and everything changed. The clarity, the complexity, the way the same bean could taste completely different depending on how you brewed it. He was hooked.
What followed was years of testing every dripper, grinder, kettle, and filter he could get his hands on. Comparing Chemex vs V60 vs Kalita. Dialing in grind size by the click. Learning why water temperature matters more than most people think. Building a morning ritual around a process that is as meditative as it is delicious.
Ethan is not a Q Grader, certified barista, or