You know that feeling when your pour over looks perfect, but the taste just isn’t quite right? Maybe it’s too weak, or bitter, or just flat-out inconsistent from cup to cup. There’s a frustrating gap between what you want and what actually hits your mug.
Here’s the thing: most home brewers underestimate how much control a gooseneck kettle gives. It’s not just about hot water—it’s about how precisely you deliver it. Without that control, even the best beans and grinders can’t save a lackluster brew. And honestly? Wasting good coffee hurts more than you’d think.
By the end, you’ll know exactly how to choose and use the perfect gooseneck kettle for incredible gooseneck kettle guide pourover results. You’ll master pours, conquer stubborn brewing ruts, and discover why small details add up—get ready for a new kind of morning ritual.
Why Gooseneck Kettles Matter For Great Pour Over Coffee
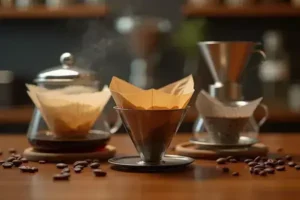
Pour over coffee can look simple — but getting that balanced, bright cup at home? It’s often trickier than you think. That’s where gooseneck kettles come in, and why so many baristas won’t brew without one.
Let’s be honest: using a regular kettle often feels like a guessing game. Water gushes out or dribbles unevenly, messing with both extraction and temperature stability. Every pour pattern impacts how your grounds bloom or choke. That precision you crave? It starts and ends with control — the kind only a gooseneck spout delivers.
💡 Pro Tip: For optimal flavor clarity, control your pour speed and spiral pattern (not just “slow and steady”). The Specialty Coffee Association highlights these variables as key factors influencing extraction quality and consistency at home.
In practice:
Picture this scenario: you’re brewing a single-origin Ethiopia on a busy Tuesday morning. With a standard stovetop kettle, water surges onto the grounds, creating channels and leaving dry spots. The flavor gets muddled, wild, and unpredictable. Now, imagine holding a gooseneck kettle — you guide a narrow, steady stream in careful concentric circles, hitting every patch of grounds evenly. The result? Balanced acidity, sweeter notes, remarkable clarity. Even if you use the same coffee, the difference is night and day.
- Targeted Pouring: Lets you bloom and pulse water exactly where you need it for even extraction.
- Flow Rate Control: Prevents over-extraction (bitterness) and under-extraction (sourness), crucial for specialty beans with delicate aromas.
- Temperature Consistency: Many models feature built-in thermometers or electronic temperature control, which the National Coffee Association notes is vital for unlocking a coffee’s full flavor profile (195–205°F, or 90–96°C).
| Feature | Standard Kettle | Gooseneck Kettle |
|---|---|---|
| Spout Control | Wide, hard to direct | Precise, easy to moderate |
| Pour Speed | Unpredictable surges | Smooth, controlled stream |
| Extraction Quality | Variable, often uneven | Even, repeatable results |
Curious if a gooseneck actually upgrades your morning ritual? What actually works might surprise you…
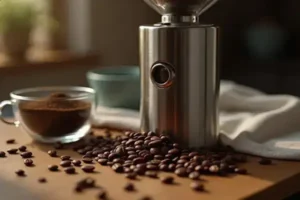
Choosing The Right Kettle: Materials, Size, And Features You Need
Choosing your first gooseneck kettle can feel overwhelming — so many brands, shapes, and features all promising “perfect pours.” But which ones matter when you actually brew at home? Let’s break it down so you don’t waste time or money.
💡 Pro Tip: For most home coffee enthusiasts, a 1-liter stainless steel gooseneck strikes the sweet spot — it’s easy to handle, heats evenly, and fits common dripper sizes. The Specialty Coffee Association recommends stainless steel for its durability and consistent heat retention.
Here’s the thing: materials don’t just affect how a kettle looks. They directly impact heat-up speed and flavor. Stainless steel is classic — it’s durable, resists staining, and works on most stovetops, including induction. Copper heats quickly and looks gorgeous, but it’s pricey and requires regular polishing. Glass gives you total visibility (you’ll see every bubble), but it’s fragile and loses heat fast. For premium electric goosenecks, like Fellow Stagg EKG, you’ll often find coated stainless steel with precise temperature control and hold features.
Key Factors to Consider
- Capacity: Most brewers need 0.8 to 1.2 liters. Too small? You’re forced to refill mid-brew. Too big? Clumsy control and wasted water.
- Spout Shape: A longer, narrow gooseneck delivers maximum precision. Look for a gentle curve, not a steep drop — that’ll help you pour slow and steady.
- Handle Design: Is it comfortable? Heat resistant? Angled handles offer the best wrist ergonomics for repetitive pours.
- Temperature Control: Built-in or external thermometer helps you stay between 195°F–205°F, the National Coffee Association’s recommended brewing range.
- Stovetop vs Electric: Electric models usually add auto shut-off, hold modes, and variable temp — essential for multi-taskers but pricier upfront.
Comparison Table: Popular Gooseneck Kettle Types
| Material | Heat Retention | Best For |
|---|---|---|
| Stainless Steel | Excellent | Durability, daily use |
| Copper | Very Good | Speed, aesthetics |
| Glass | Poor | Visibility, light brewing |
In practice: Imagine waking up and reaching for your heavy 1.2L glass kettle. The water’s cooled by the time you reach your second pour and the handle’s awkward to grip. Now, swap that for a compact, well-balanced stainless steel version—with a precise thermometer—your routine never spirals off course. Suddenly, that first cup tastes like something from a specialty café.
But there’s one detail most owners completely overlook until it’s too late…
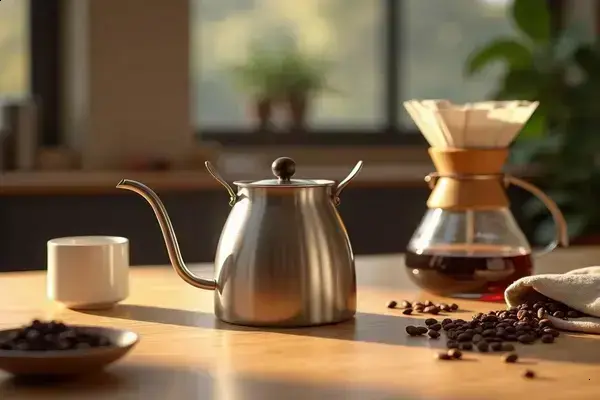
How To Master Pour Over Technique With A Gooseneck Kettle
Ever wonder why some people’s pour over coffee tastes so much brighter, cleaner, and consistent? Here’s the truth: it’s not just great beans. Mastery comes from how you use your gooseneck kettle—controlling rhythm, flow rate, and timing with real intention.
- Brewed coffee you love is all about repeatable technique, not guesswork or fancy gadgets.
- Water movement (yes, the actual path you pour!) matters as much as grind setting or filter type.
💡 Pro Tip: Use a gooseneck kettle’s narrow spout to create concentric circles, starting from the center and spiraling outward. The Coffee Science Foundation highlights this pattern for optimal blooming and even extraction, especially for light-roast beans.
- Heat your water to 195–205°F—most digital gooseneck kettles feature temperature presets. Pre-wet your filter and warm your server.
- Add fresh grounds (usually 18–22g for a 300–350ml cup) and gently shake the dripper to level the bed. Consistency ensures even saturation.
- Start the bloom: Pour just enough water (roughly double the coffee weight) to soak all grounds. Stop and wait 30–45 seconds as CO₂ escapes—this makes your brew smoother.
- Pourover phase: Pour in slow, spiral motions back to front and side to side until you hit your target weight or volume. Don’t pour directly onto the filter—only the grounds.
- Finishing touch: Let water fully drain before pulling the grounds away. A flat, even bed at the end is your sign of great technique—no leftover craters!
Picture this scenario: it’s Saturday, sunlight sneaking into your kitchen as you set up your V60 dripper. With your new electric gooseneck in hand, water warms to a perfect 202°F. You control every pour, timing each spiral and pause. No more choppy “guesstimate” streams. The result? A cup so clean and fragrant you linger over it before even your first sip.
| Step | Tip | Common Mistake |
|---|---|---|
| Bloom | Use fresh, filtered water | Rushing the bloom |
| Pourover | Keep your hand steady | Pours too fast/slow |
| Finish | Wait for the full drain | Removing the dripper early |
And this is exactly where most people make the most common mistake…
Common Mistakes To Avoid For Consistent Results Every Time
What’s the biggest barrier between you and a flawless pour over? Honestly, it’s usually not your beans or grinder — it’s those sneaky habits that go unnoticed, and they’ll sabotage taste every single time if you let them slide.
- Skipping the Bloom: Many rush this first pour and miss out on releasing trapped CO₂. That extra 30 seconds, recommended by the Specialty Coffee Association, unlocks powerful sweetness and clarity.
- Poor Flow Control: Pouring too fast or too slow with your gooseneck leads to channeling. Extraction gets patchy, so your cup tastes uneven and muted.
- Wrong Water Temperature: Brewing outside the 195–205°F (90–96°C) window means you’re either missing out on delicate aromas or over-extracting bitterness. A thermometer isn’t optional — it’s essential.
- Inconsistent Ratios: Eyeballing “about right” isn’t enough. Even top baristas swear by precise gram scales to keep flavor balanced every brew.
⚠️ Important Warning: Don’t ignore water quality. Hard or chlorinated tap water can add unwanted flavors. The Specialty Coffee Association specifically recommends filtered water for best results.
Picture this scenario: you’re aiming for your best cup ever. You prep your gooseneck, measure your coffee — but last night’s water is still in the kettle, lukewarm and slightly stale. You pour anyway, rushing because time’s tight. The bloom looks patchy, your pour is uneven, and the final cup? Disappointing, despite good gear. It happens more often than you’d think — one skipped detail, and the balance is gone.
| Mistake | What It Causes | Quick Fix |
|---|---|---|
| Skipping Bloom | Flat, sour taste | Always bloom for 30–45 sec |
| Uneven Pour | Weak, unbalanced flavor | Practice steady, spiral motion |
| Wrong Temp | Bitter or dull notes | Use a thermometer |
And honestly? This is exactly where most people make the most common mistake…
Pro Tips And Tricks To Elevate Your Pour Over Experience
Once you’ve nailed the basics, a few small adjustments can genuinely transform your pour over game — and they’re not just for pros or cafe baristas. These practical, science-backed tricks deliver that “wow” factor in your daily brew without any flashy equipment upgrades.
- Preheat Everything: Don’t just rinse your filter! Warm your dripper, carafe, and even your mug before brewing. Consistent temperature through the process maintains extraction and prevents rapid cooling, which the Specialty Coffee Association points out is crucial for clarity and sweetness.
- The Pulse Pour: Instead of one big, steady pour, try dividing your water into several smaller pulses. This gives each portion of grounds repeated chances to extract evenly, unlocking complexity and sweetness that simple spiral pours sometimes miss.
- Stir Gently (or Swirl): After the bloom phase, a gentle swirl or a quick stir with a bamboo paddle breaks up stubborn dry spots and ensures every granule sees an equal amount of water — but don’t overdo it, or you risk muddying the cup.
💡 Pro Tip: To really control flavor, record your grind size, water temperature, and pour times each session. Over time, you’ll spot patterns and dial in your “house recipe.” According to James Hoffmann and World Coffee Events judges, written logs are a hallmark of consistent championship-level brewers.
In practice: Picture this scenario — it’s a rainy Sunday, you’re brewing a natural Ethiopia with a fruity profile. You preheat your gear, pulse-pour with intention, and finish with a careful swirl. By tracking each tweak in your notebook, you discover your best flavors appear when the total brew time edges just past 2:30. Suddenly, every morning feels dialed and delightful.
| Pro Tip | Why It Works | How to Apply |
|---|---|---|
| Pulse Pour | Prevents channeling | Split pour into 4 parts |
| Preheat Gear | Maintains extraction temp | Rinse dripper & carafe with hot water |
| Keep Notes | Easy flavor tuning | Write down recipe after brew |
Once this is in place, the rest of the routine falls into place naturally.
Your Best Cup Starts Now
If you take just one thing from this gooseneck kettle guide pourover, let it be: control over your pour gives you control over your flavor. Get the right kettle, learn its feel, and mind your brewing details. The difference is in the small things you do every morning.
Before, you might have felt frustrated—unsure why your coffee tasted dull or inconsistent, even with great beans. Now? You know how to choose your tools, avoid classic mishaps, and add pro-level touches to every brew. Better coffee’s just a confident pour away. You’re more ready than you think.
What’s your next move—upgrading your kettle, perfecting your pouring, or trying a new tip from the list? Share your pour over plans (or struggles!) in the comments. Let’s make every cup count.

Ethan Cole Hargrove is a pour over coffee enthusiast, specialty coffee writer, and the founder of this blog — built for anyone who has ever tasted a truly great cup of coffee and wanted to understand exactly how to make it at home.
Ethan’s coffee journey started the way most do — with a supermarket blend and a cheap drip machine. Then one morning at a specialty café, a barista handed him a pour over and everything changed. The clarity, the complexity, the way the same bean could taste completely different depending on how you brewed it. He was hooked.
What followed was years of testing every dripper, grinder, kettle, and filter he could get his hands on. Comparing Chemex vs V60 vs Kalita. Dialing in grind size by the click. Learning why water temperature matters more than most people think. Building a morning ritual around a process that is as meditative as it is delicious.
Ethan is not a Q Grader, certified barista, or