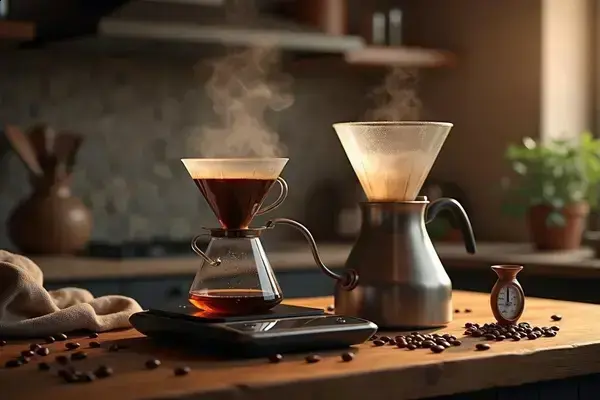
You’re carefully pouring water over your grounds—hoping for that clean, bright cup—but something feels off. Maybe your coffee tastes a little dull, burned, or just not like that perfect café brew you dream of making at home.
The thing is, a lot of home baristas overlook how much water temperature can make or break your pour over. A few degrees too hot or too cool, and those beans don’t stand a chance—leaving you wondering what went wrong. It’s that silent saboteur, quietly ruining flavor and consistency right under your nose.
Once you understand and dial in the water temperature pour over guide, you’ll be able to coax the very best out of every coffee—bright acidity, layered sweetness, and that silky finish. Ready to finally find the temperature sweet spot your morning routine has been missing?
Understanding Extraction: How Water Temperature Changes Your Coffee
Ever wondered why some pour over coffees taste vibrant and sweet, while others seem flat or strangely bitter—even with the same beans? The key often lies in the science of extraction, and more specifically, what temperature you use for your water. Coffee pros talk about extraction all the time, but the truth is, most home brewers struggle with it because small variations in temperature can completely change the flavor profile you get from your grounds.
So, what does “extraction” actually mean here? In plain English: it’s the process of pulling out soluble compounds from your coffee grounds into your cup. Temperature controls how fast and how much is extracted. Hit too low—below 195°F (90°C)—and your cup may taste sour, grassy, or just too weak. Crank it above 205°F (96°C), and suddenly you risk drawing out harsh bitterness, astringency, and muddled flavors.
💡 Pro Tip: According to the Specialty Coffee Association, the optimal brewing temperature for pour over sits right between 195°F and 205°F (90–96°C). Staying in this range can dramatically reduce the risk of under- or over-extraction, resulting in a balanced, aromatic cup every time.
Let’s put this into a real-life scenario: Picture this scenario: you’re using a fresh bag of single-origin beans that promised “citrus and berry notes.” The first morning, you pour just-off-boil water—too hot—and end up masking those sweet notes with bitterness. The next day, you try tepid water from the kettle, and the cup tastes sour and underwhelming. That’s the power of extraction, and why temperature precision matters more than you’d think.
| Water Temp | Extraction Risk | Tasting Notes |
|---|---|---|
| Below 195°F (90°C) | Under-extracted | Sour, weak, grassy |
| 195–205°F (90–96°C) | Balanced extraction | Sweet, bright, complex |
| Above 205°F (96°C) | Over-extracted | Bitter, harsh, muddled |
If you want reliable results, aim to maintain your kettle’s temperature within those crucial bounds throughout the brew. And don’t forget—the mineral content of your water, grind size, and brew time all interact with temperature, but it’s the heat that sets the baseline for everything else.
But there’s one detail most home brewers overlook until it’s too late…
The Ideal Temperature Range For Pour Over Brewing
How hot should your water be for the perfect pour over? This question keeps popping up on every specialty coffee forum—from Reddit to the Specialty Coffee Association itself. The truth is, dialing in the ideal temperature isn’t about guessing or simply boiling and waiting. It’s about precision and understanding how temperature shapes every single extraction variable in your mug.
Here’s the thing: top industry standards, like those from the Specialty Coffee Association, recommend a water temperature range between 195°F (90°C) and 205°F (96°C) for pour over brewing. This ten-degree window isn’t arbitrary. It’s built on hundreds of taste trials, chemical analyses, and real-world cafe experience. Go too cool, and your cup turns out sour and lifeless. Too hot, and you’ll pull out bitterness or even scald delicate aromas.
💡 Pro Tip: Use a thermometer or a variable temperature kettle to target and maintain your water exactly within the 195°F–205°F window. If you don’t have one, waiting 30 seconds after boiling usually drops it into range—but results can vary with altitude and kettle type.
- 195°F–199°F (90–93°C): Great for lighter roasts, high-acidity beans, or floral single origins.
- 200°F–205°F (94–96°C): Ideal for medium or dark roasts, nuttier profiles, or when you want more body.
- Below 195°F (90°C): Often under-extracts—expect flat, sour, or grassy results.
- Above 205°F (96°C): Easily over-extracts, causing harshness and bitterness.
In practice: Picture this scenario—you’re making a pour over with a new Ethiopian Yirgacheffe. One day you use water straight off the boil (about 212°F), and your cup tastes extra harsh. Next time, you stick with 200°F, and suddenly it’s all vibrant citrus and tea-like clarity. That’s not magic—it’s repeatable science in your kitchen.
| Temperature (°F/°C) | Use Case | Flavor Result |
|---|---|---|
| 195–199 / 90–93 | Light roast, high-acid beans | Bright, floral, sweet |
| 200–205 / 94–96 | Medium/dark roast or full body | Balanced, bold, rich |
| Above 205 / >96 | Rare, risk of bitterness | Harsh, burnt, astringent |
And this is exactly where most people make the most common mistake—assuming “hot enough” always means better extraction…
Common Mistakes And How To Fix Temperature Issues
Here’s a question: how many times have you followed a pour over recipe to the letter, only for your coffee to turn out subpar? It’s a shared frustration—and often, the culprit is hiding in your temperature control. Even seasoned coffee lovers miss the small details that throw everything off.
- Using water that’s too hot or too cold: Rushing to pour water right after boiling is a classic mistake. On the flip side, letting the kettle sit too long drops the temp below optimal fast.
- Relying on visual cues alone: Steam doesn’t mean your water’s the right temp, and “just before boiling” can mean many things depending on altitude and kettle type.
- Not preheating your equipment: If your dripper, carafe, or mug are cold, they’ll immediately steal several degrees from your brew water—sometimes enough to shift extraction out of that sweet spot.
- Lack of consistent measurement: Guessing is risky. Digital thermometers and variable temp kettles produce far more reliable pours (and better results for those costly single-origin beans).
⚠️ Important Warning: According to the National Coffee Association, sudden changes in brewing temperature can cause both under- and over-extraction in the same cup—leading to odd flavors and wasted coffee. Try tracking your temperature over several attempts for more predictable results.
- Bring water to a full boil, then let it stand 30-45 seconds for most home situations. This usually lands you safely in the 195°F–205°F range.
- Preheat all brewing equipment—pour a bit of hot water into the dripper and carafe, swirl, and discard. This prevents heat loss before you start brewing.
- Use a digital kitchen thermometer or a variable temperature kettle for accuracy. Don’t have either? Err on the side of slightly hot rather than cool.
- Pour consistently and evenly to avoid hot and cold pockets in the grounds that can create inconsistent extraction zones.
- Calibrate with your batch size—smaller amounts lose heat faster, so work quickly and consider slightly higher starting temps for single-cup brews.
In practice: Picture this scenario—Emma loves experimenting with pricey micro-lot beans. One weekend, her Chemex brew tastes weirdly flat. She finds her mug was ice-cold before brewing, dragging her water temp down by almost 10°F. Next time, she preheats her gear and suddenly those elusive fruit notes actually appear.
| Mistake | Impact | How To Fix |
|---|---|---|
| Pouring straight-from-boil | Burnt, bitter taste | Cool 30-45 sec before pouring |
| Skipping preheat | Flat, weak extraction | Preheat dripper/mug each time |
| No thermometer | Inconsistent results | Invest in a temp kettle or quality thermometer |
What actually works might surprise you…
Testing And Adjusting Your Water Temperature At Home
How do you actually know if your water temperature is right—especially if you don’t have a pro barista setup at home? Testing and adjusting water for pour over isn’t guesswork; it’s hands-on science you can do with tools from any kitchen (plus a little curiosity).
- Digital Thermometer: The gold standard. Inexpensive models like the CDN ProAccurate or ThermoWorks ThermoPop read temps in seconds and are accurate to a degree or less.
- Variable Temperature Kettle: Models from Fellow, Bonavita, or Breville let you set the exact number you need. Pricey? Yes, but game-changing for daily brewers.
- No tech on hand? You can get close: boiling water left off the heat for 30 to 45 seconds usually cools to around 200°F (93°C) at sea level—but altitude and room temp can shift results.
💡 Pro Tip: The Specialty Coffee Association recommends checking your temperature just before pouring, not as soon as the kettle stops boiling. Water can lose several degrees while you grind beans or set up your dripper—timing matters more than you think.
- Bring water to a full boil. Let it rest off-heat if you don’t have a variable-temp kettle.
- Use your thermometer or the waiting method. Measure right before starting to pour, or count 30–45 seconds after boiling for a rough estimate.
- Preheat your dripper and carafe. Swirl hot water and pour it out—this keeps your brewing temp stable.
- Do a “test pour.” Brew a small amount and check flavor. If it’s sour, your water may be too cool; bitter, and it’s likely too hot.
- Log your results. Keep notes on what temp produces the flavor you love, so you can adjust confidently with different beans or seasons.
In practice: You’re using a classic Hario V60, a supermarket kettle, and a cheap probe thermometer. Your first test reads 185°F—too low! You boil again, rest 30 seconds, and nail 200°F. The next brew bursts with fruit and sweetness.
| Method | Accuracy | Best For |
|---|---|---|
| Thermometer | High | Anyone wanting consistency |
| Variable Kettle | Very High | Daily pour over, coffee enthusiasts |
| Manual Timing | Moderate | Beginner, limited equipment |
And this is exactly where most people make the most common mistake…
Essential Tools To Master Your Pour Over Routine
Mastering pour over coffee at home isn’t just about the beans—it’s about having the right tools in your corner. Seriously, the difference between “pretty good” and “jaw-dropping” can come down to equipment you thought was optional. Want control, consistency, and café-level flavor? It takes more than just a kettle and a mug.
- Gooseneck Kettle: This is a must for controlled, even pouring—especially if you’re aiming to hit precise brew profiles every time.
- Precision Coffee Scale: Measuring both your grounds and your output by weight (not scoops or spoons) makes your brews repeatable. Splash-proof, fast-response models from brands like Hario, Acaia, and Timemore dominate the specialty scene.
- Thermometer or Variable Temperature Kettle: Monitoring your water within a single degree (ideally 195–205°F) takes the guesswork out. The Fellow Stagg EKG and Bonavita are gold standards here.
- Burr Grinder: Uniform, fresh grinding means better extraction, notably with lighter roasts. Coffee pros trust Baratza and Timemore for home use, but any burr (not blade) option is a major upgrade.
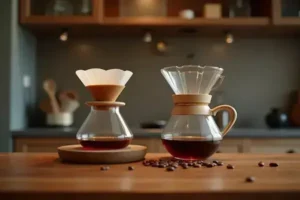
- Quality Filters and Dripper: Hario V60, Kalita Wave, and Chemex all create different flavor nuances, thanks to their filter shape, flow rates, and materials.
💡 Pro Tip: According to the Specialty Coffee Association, investing in a precision scale and temperature-controlled kettle is the single fastest way for home brewers to close the gap with professional pour overs. Don’t let marketing hype distract from these practical picks—start small, then expand your kit.
In practice: Imagine waking up with a sleepy mind, fumbling for a scoop and an old teapot. You guess at your ratios and temps, and the cup tastes “off.” Now picture your setup with a shiny Acaia scale, a Fellow kettle, and a perfectly dialed-in grind. Suddenly, flavors are bright, clear, and repeatable every single morning.
| Tool | Why It Matters | Recommended Brands |
|---|---|---|
| Gooseneck Kettle | Pour control and consistency | Fellow, Bonavita |
| Precision Scale | Exact ratios every time | Acaia, Hario, Timemore |
| Burr Grinder | Uniform, fresh grind | Baratza, Timemore |
Once this is in place, the rest of the routine falls into place naturally.
Your Perfect Pour Over Is Closer
If you take just one thing from this guide, let it be: getting your water temperature pour over guide dialed in is what unlocks clean, sweet, full-flavored coffee at home. Know your extraction, stick to that 195–205°F range, and use simple tools—and you’ll see the difference pour after pour.
Before reading, pouring water felt like guesswork that led to bitter or dull cups. Now, you know the reasons behind those results and how to actually fix them. You’ve got the tools, confidence, and know-how to brew café-level coffee on any morning you choose. Steps that once seemed “advanced” are now second nature.
Which water temperature tip are you most excited to try next in your morning routine? Let us know in the comments—can’t wait to read what you discover!
Ethan Cole Hargrove is a pour over coffee enthusiast, specialty coffee writer, and the founder of this blog — built for anyone who has ever tasted a truly great cup of coffee and wanted to understand exactly how to make it at home.
Ethan’s coffee journey started the way most do — with a supermarket blend and a cheap drip machine. Then one morning at a specialty café, a barista handed him a pour over and everything changed. The clarity, the complexity, the way the same bean could taste completely different depending on how you brewed it. He was hooked.
What followed was years of testing every dripper, grinder, kettle, and filter he could get his hands on. Comparing Chemex vs V60 vs Kalita. Dialing in grind size by the click. Learning why water temperature matters more than most people think. Building a morning ritual around a process that is as meditative as it is delicious.
Ethan is not a Q Grader, certified barista, or