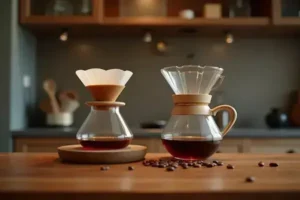
Picture this: It’s a scorching afternoon, and you’re craving that chilled, creamy coffee you get at your favorite café. You check your kitchen… not a fancy gadget in sight. Do you give up? Absolutely not—because cold brew isn’t about equipment; it’s about method and patience.
Trying to whip up cold brew at home often leads to frustration. You might end up with something bitter, watery, or just plain disappointing. It can feel like coffee shops are keeping the smooth, rich secret to themselves while you’re left with a lifeless attempt that doesn’t hit the spot. Honestly, we’ve all poured one down the drain.
By the end of this guide, you’ll know how to make cold brew coffee at home that rivals the best barista creations—without buying any new gear. Grab your favorite mug, because your perfect cold brew is just a few steps away. Ready to see how simple it can be?
What Makes Cold Brew Different From Regular Coffee
Why does cold brew taste so much smoother than your usual hot coffee poured over ice? The secret isn’t just in the serving temperature — it’s in the fundamentals of how the coffee is made, extracted, and enjoyed.
Here’s the thing: cold brew skips heat entirely. Instead, ground coffee steeps for hours in cold water, gently coaxing out flavors and leaving many harsh acids and oils behind. That’s why you end up with a drink that’s low-acid, less bitter, and naturally sweet, even without sugar. According to the Specialty Coffee Association, the difference in extraction temperature alone changes which compounds make it into your cup.
💡 Pro Tip: Cold brew typically uses a higher coffee-to-water ratio. This means it’s concentrated — you can dilute it with water, milk, or even tonic water to create your own signature drink.
| Brew Method | Flavor Profile | Acidity & Strength |
|---|---|---|
| Cold Brew | Rich, chocolatey, mellow, subtly sweet | Low acidity, high caffeine when undiluted |
| Hot Brew (Drip/Espresso) | Bright, sharp notes, sometimes bitter | Higher acidity, standard caffeine |
| Iced Coffee (Hot Brew Chilled) | Can taste stale or watered | Moderate to high acidity, weaker flavor |
In practice: imagine prepping your cold brew the night before a busy workday. You wake up to a fresh, concentrated batch that’s smoother on your stomach. No harsh aftertaste, no need for extra sweetener — and it stays delicious for up to a week in the fridge. That’s the kind of low-fuss refinement that hot-brew fans rarely experience, at least outside specialty coffee shops.
The truth is, many coffee drinkers switch to cold brew to avoid the jitters triggered by the higher acidity of hot coffee. A study referenced by the National Coffee Association found that cold brew can contain 60-70% less acidity, making it a gentle choice for sensitive stomachs.
But there’s a catch almost everyone misses: choosing the right beans — and the right grind — can be the difference between a smooth, sophisticated brew or a muddy, flat disappointment. What actually works might surprise you…
Choosing The Best Coffee Beans For Home Brewing
Ever wondered why some homemade cold brews taste rich and complex, while others end up flat or muddy? The truth is, the coffee bean you choose shapes everything—flavor, aroma, even how smooth your final cup feels.
For cold brew at home, you’re not just picking any coffee. You want beans that complement the slow steeping process, which highlights chocolatey, nutty, and sometimes fruity notes, rather than the sharp, acidic tones brought out by hot brewing methods. Many specialty roasters and the National Coffee Association suggest starting with a medium to dark roast, since these tend to deliver that coveted smooth profile.
- Roast Level: Medium-dark or dark roasts typically produce a deeper, rounder cold brew.
- Origin: Beans from Brazil, Colombia, or Ethiopia provide sweet, low-acid options prized for cold extract.
- Processing Method: Washed coffees taste bright and clean, while natural or honey-processed beans offer extra body or fruit hints.
💡 Pro Tip: Buy whole beans instead of pre-ground—freshly grinding just before brewing preserves aroma and quality. According to Sweet Maria’s (an authority on home roasting), grind size should be coarse, like raw sugar, for best clarity and filtration.
In practice: picture this scenario—two friends each brew at home. One uses a classic dark roast Colombian, freshly ground, the other grabs a shelf-stable grocery blend already pre-ground. After 16 hours, the first cup is velvety, almost chocolate-like, while the second is surprisingly harsh and thin. The difference? Bean selection plus grind freshness, no fancy gear required.
| Roast/Origin | Flavor in Cold Brew | Best For |
|---|---|---|
| Brazil (Medium-Dark) | Nutty, chocolate, mild fruit | Smooth, classic cold brew flavor |
| Ethiopia (Natural) | Blueberry, floral, vibrant | Unique, complex iced drinks |
| Colombia (Dark Roast) | Caramel, cocoa, round body | Rich, café-Style cold brew |
But here’s what most home brewers overlook until it’s too late—the wrong grind or bean keeps your cold brew from shining. And this is exactly where most people make the most common mistake…
Step-By-Step: Making Cold Brew With What You Have
Worried you need specialty gear just to make great cold brew at home? The truth is, you probably already have everything you need sitting in your kitchen. It’s more about patience and method than expensive equipment.
- Coarse ground coffee (freshly ground is better, use any grinder or even pre-ground in a pinch)
- Filtered water (cold or room temp)
- Large mason jar, pitcher, or any clean glass container
- Fine mesh strainer or clean kitchen towel
- Secondary jar or bottle for storage
💡 Pro Tip: Use a coffee-to-water ratio of roughly 1:8 for a classic cold brew concentrate. According to the Specialty Coffee Association, this ratio delivers a bold, versatile base you can dilute to taste.
- Measure & Grind: Weigh (or estimate) 1 cup of whole beans. Grind them coarse, like raw sugar. If all you have is pre-ground, use about 2/3 cup and expect a richer, sometimes cloudier, finish.
- Add To Jar: Dump the grounds into your jar or pitcher. Pour over 4 cups of filtered water, making sure all the coffee is fully wet. Give it a gentle stir—no fancy tools required.
- Cover & Steep: Seal or loosely cover the jar. Let it sit at room temp or in the fridge for 12–18 hours. Less time? Lighter flavor. Longer? More intense—but don’t push it past 24 hours or you’ll get more bitterness.
- Strain: Place a fine-mesh strainer or a double layer of clean kitchen towel over a second jar. Pour slowly. You can repeat for extra clarity or leave it a bit rustic. No paper filter? A clean T-shirt can work in a pinch!
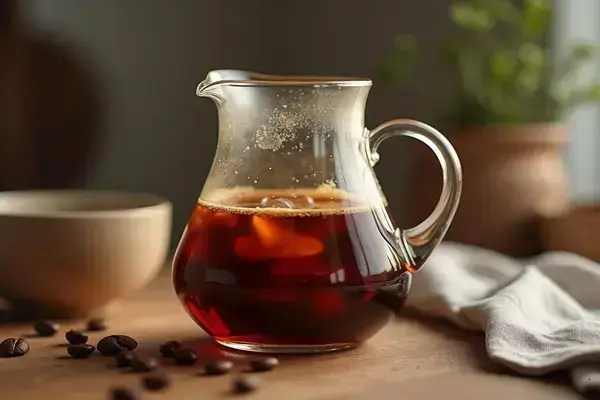
- Store & Serve: Pop your concentrate in the fridge—it’ll stay fresh for up to 1 week. Serve over ice, or dilute 1:1 with water or milk. Add sweetener or flavors if you like, but taste it straight first!
Picture this scenario: you prep your cold brew before bed, using a humble pasta jar because your French press is missing. The next morning, you strain into an old juice bottle and pour a glass over ice. That first sip—velvety, mellow, almost chocolatey—tastes like café magic made with household basics.
And this is exactly where most people make the most common mistake—so let’s tackle the fixes before you pour your first glass…
How To Fix Common Cold Brew Mistakes
Ever finish a batch of homemade cold brew and think, “That’s not what I expected at all”? You’re not alone—most people fall into a few easy-to-correct traps that sabotage their cold brew’s flavor, texture, or shelf life. Don’t let a simple misstep turn your hard work into disappointment.
- Too Bitter or Too Sour: Steeping too long can pull out harsh flavors, while under-extracted coffee (too short a brew) turns thin and sour.
- Muddy, Cloudy Brew: Using an extra-fine grind or shaking the jar will leave you with grit and murky results instead of that iconic clarity and smoothness.
- Weak Concentrate: Not using enough grounds means your cold brew ends up diluted or bland, losing its café-level punch.
💡 Pro Tip: According to the National Coffee Association, optimal extraction comes from a coarse grind, cold water, and a 12–18 hour steep. Stick within those limits for best results—going outside that window rarely ends well for flavor.
| Mistake | What Happens | Quick Fix |
|---|---|---|
| Over-steeped (bitter) | Harsh, dry aftertaste | Dilute with milk, cream or water |
| Grinds too fine | Cloudy, sludgy appearance | Strain again using a finer filter (clean towel, paper coffee filter, or nut milk bag) |
| Too weak | Watery, dull flavor | Use more coffee next batch, steep full 16 hrs |
Picture this scenario: You brew a batch using an old blade grinder from the back of the cupboard—accidentally grinding to a fine espresso powder. The next day, your cold brew pours out silty and thick, making you question the process. It’s a classic rookie error, but an easy fix: re-strain through a paper filter, then plan for a coarse grind next time. Small adjustment, massive difference.
And honestly? The most overlooked solution is just a touch more patience—cold brew shines with measured time and care, not force or speed. But there’s one detail most owners completely overlook until it’s too late…
Storing, Serving And Customizing Your Cold Brew
How do you keep your homemade cold brew fresh, bold, and ready for any craving? Proper storage and a little creativity are the secrets to unlocking endless options—all from one simple batch you brew yourself.
- Storage: Transfer your strained cold brew concentrate into a clean, airtight glass bottle or jar. Slide it into your fridge, where it’ll keep its smooth flavor for up to a week. Don’t leave it at room temperature—off-flavors creep in quickly!
- Serving: Pour over ice for the classic experience. Prefer mellow? Dilute concentrate 1:1 with cold filtered water or your favorite milk. Seeking a strong morning boost? Try it undiluted—a true café hack.
💡 Pro Tip: Add cold brew ice cubes (made from your own batch) to keep drinks strong, never watered down. According to the Specialty Coffee Association, this preserves both taste and aroma throughout your glass.
| Custom Option | Add-Ins | Best For |
|---|---|---|
| Sweet & Creamy | Oat milk, vanilla syrup, cinnamon | Breakfast, dessert, guests |
| Bold & Simple | Ice, splash of filtered water | Packed days, on-the-go sipping |
| Coffee Mocktail | Tonic water, orange peel, bitters | Special occasions, warm evenings |
In practice: picture this scenario—you rush out the door, grab yesterday’s cold brew from the fridge, and add a splash of oat milk and cinnamon for a custom latte. Next weekend, you’re hosting brunch and serve it as a refreshing coffee mocktail with tonic and citrus twists. That’s the true joy of cold brew at home: it fits your life, not the other way around.
Once this is in place, the rest of your coffee routine falls into place naturally—enjoying café-level drinks all week, with less waste and way more flavor.
Your Café-Quality Cold Brew Awaits
You started out wondering if smooth cold brew was even possible at home—no gadgets needed. Now you know: choosing the right beans, keeping the grind coarse, and sticking to the simple slow-steep method changes everything. If you take just one thing from this cold brew coffee guide at home, let it be: patience, not pricey equipment, is your real secret ingredient.
Remember how bitter or watery those first tries used to taste? That’s all in the past. Now you can wake up to rich, custom cold brew every week—no coffeehouse trip required. It’s fresh, flexible, and totally in your control. The hard part was just starting, but you’re already ahead of the curve.
What twist or flavor are you most excited to try in your next batch? Tell us in the comments and share your favorite cold brew tips—we’re all learning together!

Ethan Cole Hargrove is a pour over coffee enthusiast, specialty coffee writer, and the founder of this blog — built for anyone who has ever tasted a truly great cup of coffee and wanted to understand exactly how to make it at home.
Ethan’s coffee journey started the way most do — with a supermarket blend and a cheap drip machine. Then one morning at a specialty café, a barista handed him a pour over and everything changed. The clarity, the complexity, the way the same bean could taste completely different depending on how you brewed it. He was hooked.
What followed was years of testing every dripper, grinder, kettle, and filter he could get his hands on. Comparing Chemex vs V60 vs Kalita. Dialing in grind size by the click. Learning why water temperature matters more than most people think. Building a morning ritual around a process that is as meditative as it is delicious.
Ethan is not a Q Grader, certified barista, or