You wake up, craving that first sip of coffee—dreaming of a cup as balanced and bright as any barista’s creation. But more often than not, your kitchen setup leaves you settling for something less. Why does getting café-quality flavor at home feel so complicated?
The truth is, pour over coffee isn’t just for snobs or Instagram feeds. Still, with so many dripper styles, materials, and brewing gadgets out there, choosing the right one can make your morning ritual feel more stressful than soothing. Confusing? You bet. But you don’t have to just settle and hope for the best.
By the time you finish this best pour over coffee maker guide, you’ll confidently spot the differences, dodge disappointing gear, and brew every cup to match your own style. Ready to upgrade your mornings? Let’s get going.
What Makes Pour Over Coffee Unique?
You ever wonder why pour over coffee just feels different from anything that comes out of a machine? It’s not just hipster hype. When you brew with a pour over—think Hario V60, Chemex, or Kalita Wave—you’re in total control of every variable, from water temperature to the gentle, spiraling pour. It’s like the difference between opening a can of soup and making your own from scratch. One’s quick, the other’s crafted.
Here’s the thing: the magic starts with extraction. With pour over, hot water meets the coffee grounds evenly, pulling out subtle flavors you wouldn’t get in a big automatic drip maker. That slow, intentional bloom lets you taste the bean itself—fruitiness, chocolate, even a hint of spice—without the bitterness or muddiness some machines leave behind. Specialty Coffee Association (SCA) research backs this up: control over variables like grind size and flow rate leads to a sweeter, more nuanced cup.
💡 Pro Tip: Let your coffee “bloom” for 30-45 seconds after the first pour. This little wait releases CO2 trapped in fresh grounds, unlocking richer flavors and a brighter finish.
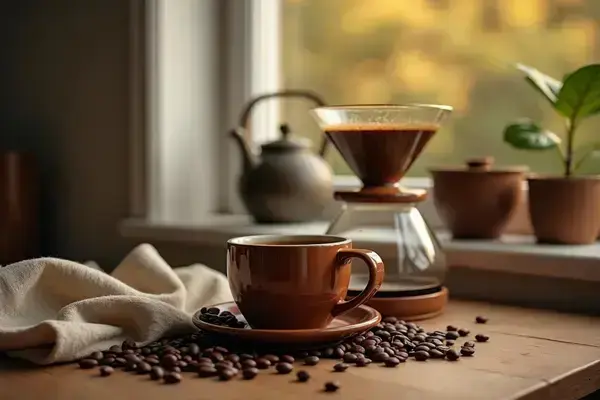
Picture this scenario: it’s a rainy Saturday. The kitchen fills with the low hiss of your gooseneck kettle, steam curling above swirling coffee grounds. You inhale, waiting for that first note of citrus and caramel in the bloom. It’s just water, beans, and gravity—but somehow, the cup tastes like something made just for you.
- Full flavor clarity: Unlike French press or drip, pour over emphasizes aroma and the delicate top notes of high-quality single-origin beans.
- Repeatable process: By tweaking water temp (195–205°F), grind, and pour rate, you can dial in your cup and make it perfect every time.
- Minimal sediment: Paper filters trap oils and fines, giving you a clean, crisp finish in every sip.
According to studies from the National Coffee Association, enthusiasts consistently rank pour over as the top method for pulling out complex, layered flavors. It’s hands-on, yes—but worth the ritual if taste is your top priority.
But here’s one corner of pour over most folks skip: understanding how your dripper’s shape and material influence every single cup. What actually works might surprise you…
Top Materials And Designs: Pros And Cons
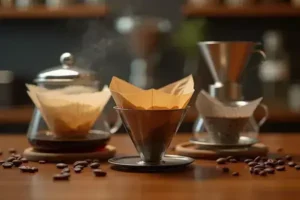
Ever grab a dripper and wonder—glass or ceramic, stainless steel or plastic—does it even matter for flavor? The short answer: absolutely. Each pour over coffee maker material shapes heat retention, extraction time, and even the way your brew tastes. The Specialty Coffee Association highlights that dripper design impacts both consistency and taste clarity, influencing your daily cup far more than most people realize.
Picture this scenario: you’ve just bought a beautiful glass dripper. It looks amazing on your counter, but your coffee cools quickly—leaving you sipping a lukewarm cup by the second pour. You swap to thick ceramic, and suddenly your brew holds its heat. Turns out, the vessel can matter as much as the beans.
| Material | Pros | Cons |
|---|---|---|
| Glass | Excellent visibility; no aftertaste; gorgeous design | Fragile; loses heat quickly; can be pricey |
| Ceramic | Great heat retention; classic look; easy to clean | Heavy; breakable; can be slow to heat up |
| Stainless Steel | Very durable; retains heat decently; often reusable filters | Can impart metallic flavors if not high quality |
| Plastic | Lightweight; affordable; heats up fast | Can retain odors; some types less eco-friendly |
💡 Pro Tip: Warm your dripper with hot water before brewing—especially glass or ceramic. The National Coffee Association confirms this simple step prevents temperature shock and truly boosts your flavor extraction.
- Cone vs. Flat-Bottom: Cone-shaped drippers like the Hario V60 allow more control over pour technique and flow rate. Flat-bottoms, like the Kalita Wave, are more forgiving—great for beginners seeking a consistent cup every time.
- Ridges, Spirals, and Holes: Internal design also matters. Ridges and spirals (V60, Chemex) help control flow and ensure even extraction. The number and positioning of holes at the bottom affects how long water stays with your grounds.
Some specialty cafes prefer glass for transparency and aesthetic, while traveling baristas often reach for stainless steel’s reliability. But there’s one detail most owners completely overlook until it’s too late…
How To Match A Dripper To Your Brewing Style
How do you actually pick a pour over dripper that fits the coffee you want to drink—not just what looks coolest on your shelf? Most buyers never stop to think beyond aesthetics or price when, truthfully, matching the dripper to your unique brewing style makes a world of difference. The Specialty Coffee Association highlights that personalization, even more than bean choice, is what unlocks café-quality flavor from home brews.
- If you love experimenting, cone drippers like the Hario V60 allow you to play with grind size, water flow, and pouring technique. Perfect for the tinkerer who wants control over every variable and enjoys dialing in each cup. Your cups may be inconsistent at first, but the learning curve pays off with vibrant, layered flavors.
- If you value consistency, the Kalita Wave’s flat-bottom design and triple-hole drainage minimize mistakes. This model is popular with specialty cafés (think Blue Bottle) because it delivers a familiar, clean profile every time, even if your pour isn’t Instagram-ready.
- If you’re always in a hurry, plastic drippers (Melitta, OXO Good Grips) heat up fast, travel well, and can produce a satisfying brew with little fuss. Worth noting: some sacrifice on flavor complexity for the sake of speed.
💡 Pro Tip: Before buying, ask yourself: “How hands-on do I want to be?” The more interactive the dripper (think manual pour, adjusting swirl, bloom), the more you shape your results. The National Coffee Association recommends starting with a forgiving flat-bottom if you’re new, then leveling up as your palate grows.
Choosing by Brewing Personality
| Dripper | Best For | Profile |
|---|---|---|
| Hario V60 | Experimenters | Bright, nuanced, clear |
| Kalita Wave | Reliability seekers | Smooth, balanced |
| Chemex | Entertainers | Clean, subtle, visually stunning |
In practice: say you love serving a crowd on weekends. The Chemex lets you brew multiple cups at once and doubles as a showpiece on the table. But if you’re brewing solo, rushing out the door, lightweight plastic or stainless options keep things simple—no fuss, less mess.
And this is exactly where most people make the most common mistake…
Step-By-Step: Brewing The Perfect Cup Every Time
Ever wonder why your home pour over doesn’t taste quite like the coffee shop’s—no matter how fancy your beans or dripper are? The truth is, it’s all about dialing in your method. Following a clear step-by-step process matters more than hitting some “magic” ratio, and every barista worth their salt will tell you that little adjustments add up to a huge difference.
- Pour over dripper (Hario V60, Kalita Wave, Chemex, or similar)
- Freshly roasted whole bean coffee
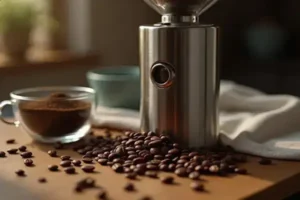
- Burr grinder
- Gooseneck kettle (for precise pouring)
- Filtered water (ideally between 195–205°F / 90–96°C)
- Scale (for accurate dosing)
- Timer
- Paper or reusable filter
- Heat water to 200°F (just off boil). If you don’t have a thermometer, let boiled water sit 30 seconds.
- Grind coffee fresh (medium-fine for cone, medium for flat-bottom). Recommended: start with 1:16 coffee-to-water ratio (ex: 25g coffee to 400g water).
- Rinse filter & preheat dripper by pouring hot water through the filter, then discard the water.
- Add coffee grounds and gently shake to level the bed.
- Bloom—pour just enough water (about double the weight of coffee grounds) to saturate. Wait 30-45 seconds while gases escape.
- Slow pour in spirals: Pour water slowly in circles, keeping the water level even. Aim for a total brew time between 2.5 to 3.5 minutes, depending on dripper style and grind.
- Let it drain completely, then remove dripper. Swirl your finished coffee before tasting to even out extraction.
💡 Pro Tip: Record each variable—dose, grind size, water temp, pour time—in a notebook or coffee app. According to the Specialty Coffee Association, consistency is the fastest path to café-tier results at home.
In practice: imagine you tweak your grind one notch finer and see the brew slow by 30 seconds. Suddenly, flavors jump—sweetness balances, acidity sings. You make note, try again next week, and realize this tiny change turned “good” into “great.” Brewing is a living process—never static.
But here’s one final trap: even small mistakes can tank your cup. And this is exactly where most people make the most common mistake…
Common Mistakes To Avoid And Pro-Level Tips
Pour over coffee isn’t rocket science—but it’s amazing how a few tiny slip-ups can mess with flavor, clarity, or temperature. Why does a cup taste perfect one day and flat the next? Most of the time, it’s not your beans—it’s one of these classic missteps holding your brew back. The National Coffee Association regularly ranks overlooked basics like water temperature and uneven pouring among the top reasons for inconsistent results in home coffee making.
- Using boiling water: Water fresh off the boil (212°F/100°C) can scorch beans, leading to bitter flavors and missing the sweetness your specialty coffee deserves. Wait 30 seconds after boiling for the ideal range (195–205°F).
- Skipping the filter rinse: Not rinsing paper filters adds papery notes to your cup and messes with the extraction temperature.
- Coarse/fine grind mismatch: Grinding too coarse: weak, under-extracted coffee. Too fine: bitterness, and the water doesn’t drain right. Always match grind to your dripper style.
- Poor pouring technique: Splashy, uneven pouring leaves dry pockets and channels, causing uneven extraction and flat flavors. Practice smooth circular pours for even saturation.
- Ignoring ratios: Eye-balling grounds vs water might work in a rush, but weighing both guarantees repeatable results. A digital scale is your best ally.
⚠️ Important Warning: Consistency is everything. According to research from the Specialty Coffee Association, logging your variables (dose, grind, water temp, time) is the fastest route from “OK” to “wow” cups every morning—no barista certificate required.
Picture this scenario: You rush through an early-morning pour over, grinding by memory, skipping the timer, pouring with one hand while scrolling your phone. The cup is… okay, maybe slightly sour. Next day, you measure, time, rinse the filter, watch the bloom. Sip. Suddenly, it’s sweet, clean, balanced—a winner every time. It’s not just the coffee—it’s your process.
Pro-Level Tips for Next-Level Flavor
- Preheat everything—dripper, mug, even your kettle spout—so heat loss doesn’t sap your cup’s flavor intensity.
- Adjust grind in small increments between brews; record the outcome to pinpoint your preference.
- Use fresh, filtered water; mineral build-up or old water will dull even the best beans’ flavors.
- Pay attention to pour height; a low, controlled pour ensures gentle agitation and full extraction.
- Experiment with agitation—like wiggling the dripper mid-brew or a gentle swirl at the end—to target even extraction.
The right habits in place now make everything easier from here.
Your Coffee Ritual Just Got Smarter
If you take just one thing from this best pour over coffee maker guide, let it be: matching your dripper, method, and grind to your personal style is the secret to next-level coffee. You’ve learned why materials and design matter, how to dial in your process, and what common mistakes to skip.
Before, brewing at home felt hit-or-miss—too much guesswork, not enough flavor. Now, you’re set up to experiment, tweak, and finally craft coffee that’s all your own. It’s not about being perfect. It’s about understanding, trying, and loving the ritual a little more each morning.
So which dripper or pro tip are you itching to try first? Share your answer in the comments—your next great cup might be one tweak away.

Ethan Cole Hargrove is a pour over coffee enthusiast, specialty coffee writer, and the founder of this blog — built for anyone who has ever tasted a truly great cup of coffee and wanted to understand exactly how to make it at home.
Ethan’s coffee journey started the way most do — with a supermarket blend and a cheap drip machine. Then one morning at a specialty café, a barista handed him a pour over and everything changed. The clarity, the complexity, the way the same bean could taste completely different depending on how you brewed it. He was hooked.
What followed was years of testing every dripper, grinder, kettle, and filter he could get his hands on. Comparing Chemex vs V60 vs Kalita. Dialing in grind size by the click. Learning why water temperature matters more than most people think. Building a morning ritual around a process that is as meditative as it is delicious.
Ethan is not a Q Grader, certified barista, or